

This is a Frozen cardboard treasure chest that I painted into a custom card box for my wedding.

I have a Fall-themed wedding so these colours will fit right in. Also, this image matches my wedding card image perfectly.

If the back of the box faces the guests on the sign-in table (so that the receptionists can put the cards in), then you would see this lovely heart-shaped leaf branch with falling leaves.

I needed a cardbox for my wedding that could close securely, was big enough for cards (but not TOO big), was easy to lug around, and that looked great. Ideally, I wanted it to match my wedding decor. I looked at lots of different boxes for sale online, but nothing really matched.

However, one day, I found this nifty cardboard treasure chest for sale at Michaels. It's a Frozen-themed Anna box and it's the perfect size. I think it was about $15 after a discount coupon. However, I didn't want Anna being the star of the wedding. The solution was to cover the box Modge-Podge style or to re-paint it. I chose to repaint mine over only some of the box images.

If you want to know how to do something similar for your wedding. Here's how I repainted my box.

Materials needed
- acrylic paint
- watercolour paint
- clear, glossy outdoor sealant
- paint brushes
- water and container
- painting palette
- black sharpie markers

Before you begin, protect the cord straps. Open the box, and pull them into the box.

Use small strips of paper to wrap around the cords. Tape the paper closed. Pull/stuff the paper into the holes so that the exposed cord is completely covered.

Grab a reference image and have it handy beside you. I printed out an enlarged image of my wedding card image and had an extra copy of my wedding cards beside me.
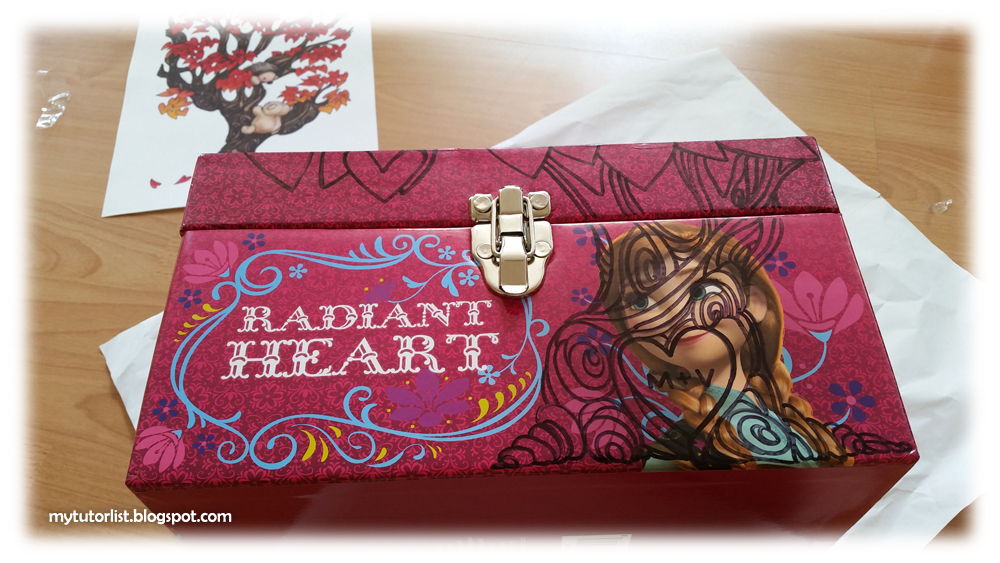
Use a black sharpie marker to start drawing your image onto the box. You may find that your sharpie marker doesn't like the coating of the box and may die out quickly. So have a few extra markers handy.

Make sure to cover up all the images on the box that you don't want - sorry, Anna!

Make sure to extend your image all over the box so that your guests will have something to look at from all angles. Or you may want to do this for your own enjoyment since you can use the box for something else later on. Maybe to keep your wedding trinkets!

When you are finished drawing, you are ready to start painting!

I did not have a lot of acrylic paint available, but I did happen to have all of my old watercolour paints from elementary school! Because of this, I was able to mix acrylic paint with watercolour paint (and water) in order to get all the colours that I wanted. The most important acrylic colours for me were white, red, and gold. I mixed red paint with red watercolour paints to get different shades of red, and I mixed white with orange and yellow to get the different shades of yellow and orange. It is important to mix acrylic paint with the watercolour because watercolour by itself is too transparent to cover the images on the box well. Also, acrylic paint sticks onto surfaces better.

I filled in all the darkest red areas first.

Then I painted in my orange and yellow areas.
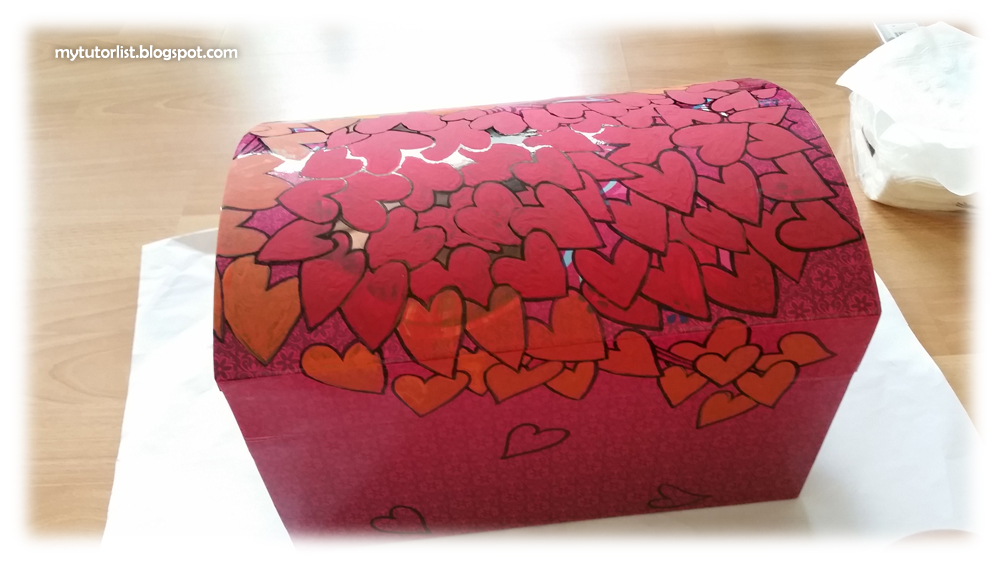
As the first areas dried, I added on additional layers of paint to make it more opaque.

I started to create a gradient on some of leaves so the bottom tips were yellow and blended up into orange and red at the tops.

More blending

Smoothing out the blending. At this point, I let the whole thing dry through dinner. Before I went to bed, I painted over the images with glossy sealant. Be very careful when you paint the sealant. The paint may rip off if you paint over areas repetitively or with too hard pressure. Use a soft flat brush and paint a generous coat of sealant in smooth, gentle single strokes. Get rid of bubbles by blowing on them so they pop.

The next day, I painted over the entire image again. You can see that the colours are now much brighter because it is layered over the original paint layer. The sealant you painted on the night before will hold the original layer in place so that it doesn't rip off when you paint onto it.

I added highlight spots onto each leaf, and used a sharpie marker to darken up all the lines that were either too light before, or accidentally got painted over.

I let it dry again over dinner and painted a glossy sealant over the paint before I went to bed.

Next morning, I'm ready to paint the tree details.

I used pure gold acrylic paint for the heart with M+V and mixed acrylic gold paint with brown watercolour paint to create more subtle gold highlights on the bark. As you can see, the end result is quite pleasing. Finally, I mixed red acrylic paint with purple to get a very similar colour to the box and painted over any bits of Anna still remaining on the box around the tree and elsewhere on the box. I chose to leave "Radiant Heart" on my box. It seemed to fit in okay with a wedding theme.
Touch up any other paint areas on your image, darken the sharpie lines as needed, and then coat the box with sealant again. Dry and then re-coat as needed to get a nice, glossy surface all over the box.
My box is done now, and I like it very much. I hope you will be happy with your card box too if you are making one!
Good luck, and Happy Wedding Planning!
Update: Some of the paint started to flake off when the temperature changed when we took it outside to the wedding venue. In hindsight, I should have primed the surface of the box using fine sandpaper to make the surface rough so that paint would adhere more securely to it. Most of the paint stayed on so it I was able to cover any bad areas with a glued on paper leaf just before the wedding - phewf!


